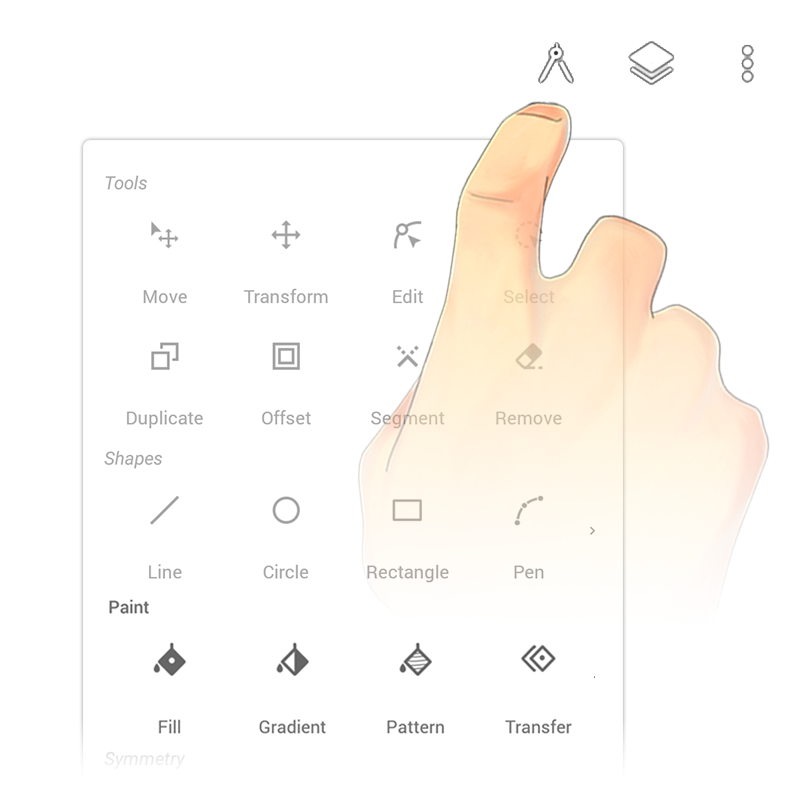
There are many different ways to color your artwork while preserving your line work. The four main paint tools are located in the overflow section: Fill, Gradient Fill, Pattern Fill, and Transfer.
Use the Fill tool to fill an empty area with solid color or tap an object to recolor it. The Fill tool remains active, letting you quickly fill multiple parts of your work. Tap on the background to change the background color.
When selecting a fill tool, the system sets the current layer as a reference layer. By moving to a separate layer you can add your fills to the new layer and reference the previous layer’s content. This is a great way to preserve your line work.
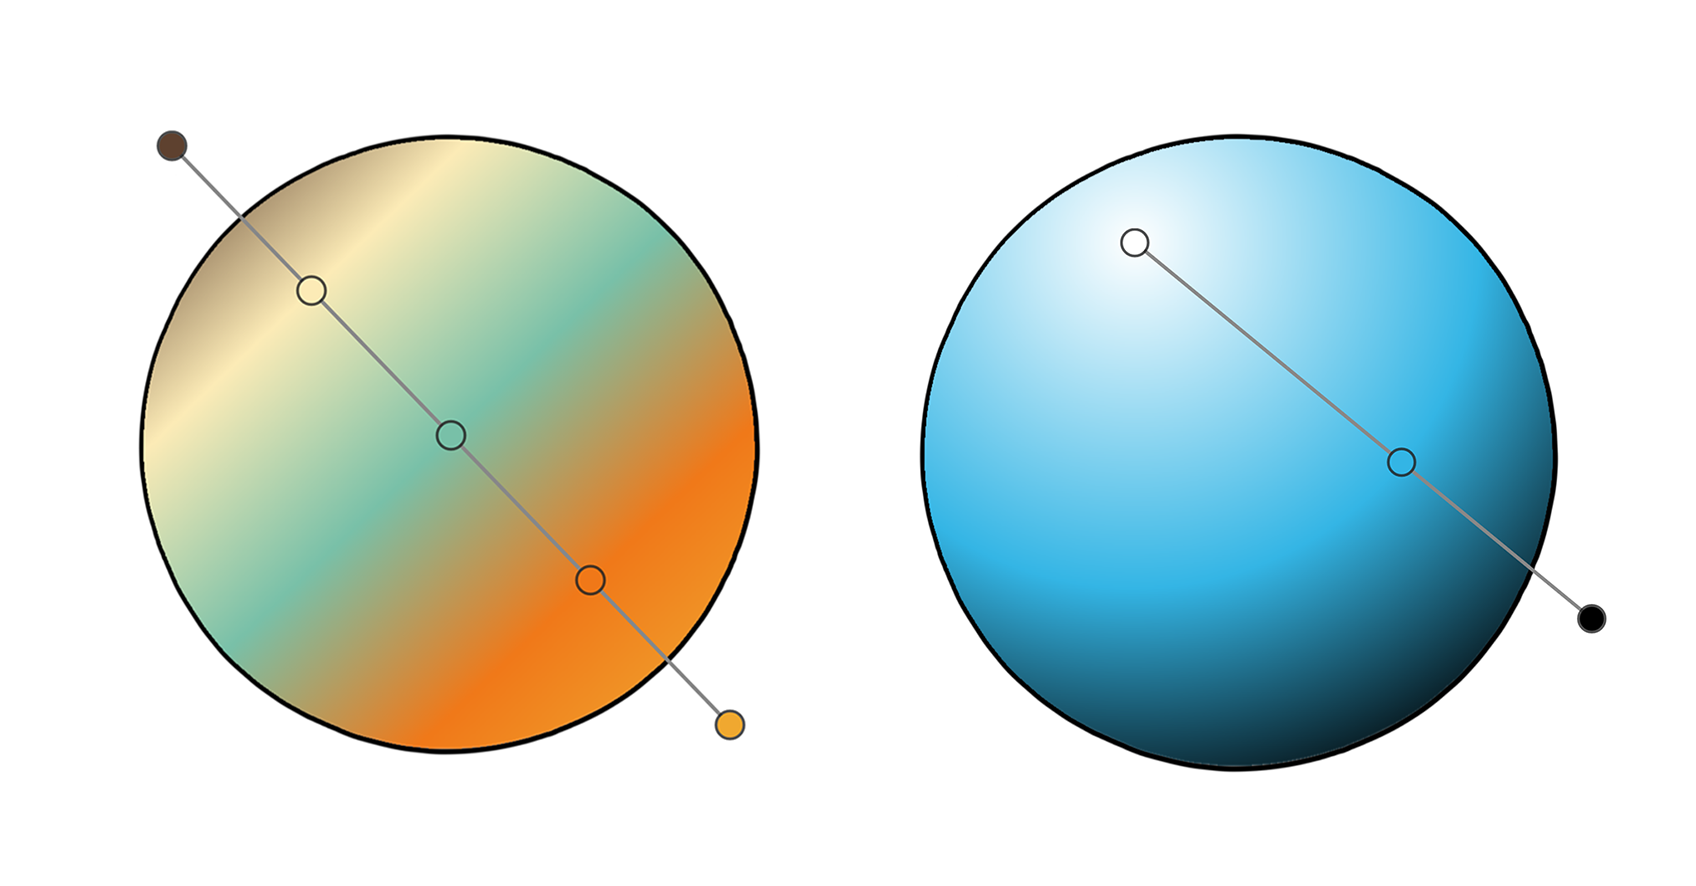
Click on an empty area or tap on an object to add a gradient. You can edit a gradient by tapping on an existing gradient with the Gradient Fill tool selected. There are a few options at the bottom of the screen.
The left icon defines the type of gradient.
The center bar displays the current gradient.
The right icon is additional options:
The Pattern Fill tool works similar to the Gradient Fill tool. Select the area you wish to fill with a pattern or click on an object. You can edit a pattern by tapping on an existing pattern with the Pattern Fill tool selected.
Tap the pattern bar to use a different pattern. The icon on the right, opens additional settings such as Hue, Saturation, and Brightness.
Use the Transfer tool to transfer the paint properties of one object to another. Simply drag from the object with the desired style to the other. This is the best way to use the same gradient or pattern across multiple objects.
Unlike a painting application, filling in a vector application is expensive. Every object on a layer must be examined. This can be time-consuming if the layer is very complex so it’s best to keep the layer you want to fill as simple as possible and keep the details of your line work on a separate layer.